RASO
Note: This installation is for Windows users only.
Steps to successfully install RASO fiscal block for print-service-go:
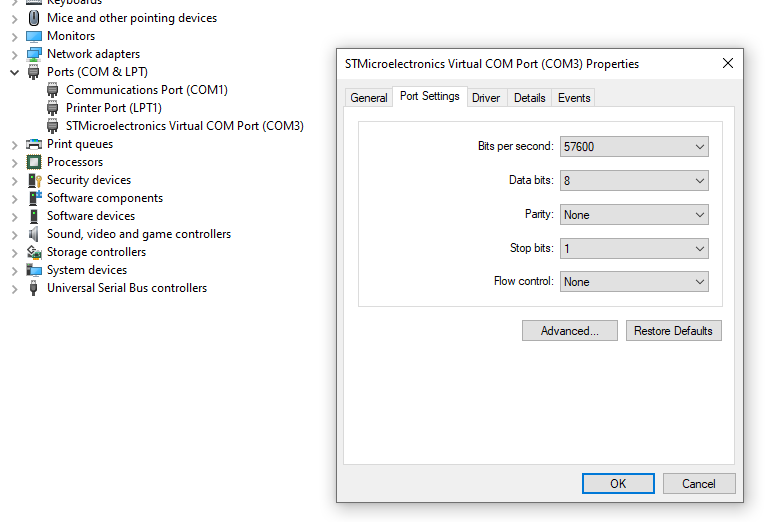
First of all, to determine whether the printer has been successfully authenticated by windows, navigate to "Device Manager" → "Ports (COM & LPT)" and make sure that "STMicroelectronics Virtual COM Port" is enabled.
Then write down the "COM" number in the parenthesis and then press right click on "STMicroelectronics Virtual COM Port", go to "Properties" → "Port Settings" and write down the "Bits per second" value.
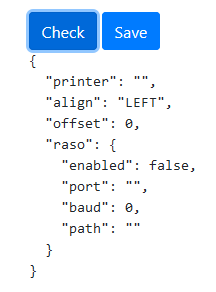
Once you have those two fields, it's time to run the application. Start the print-service-go (depending on installed SA97.dll drivers you may need to use 32bit application). Navigate to https://static.adv.bet/ab-print/ and try to press "Check" on the bottom left of the page. If print-service-go is running successfully and RASO may be supported you'll see a raw JSON output with keyword "raso" among the lines.
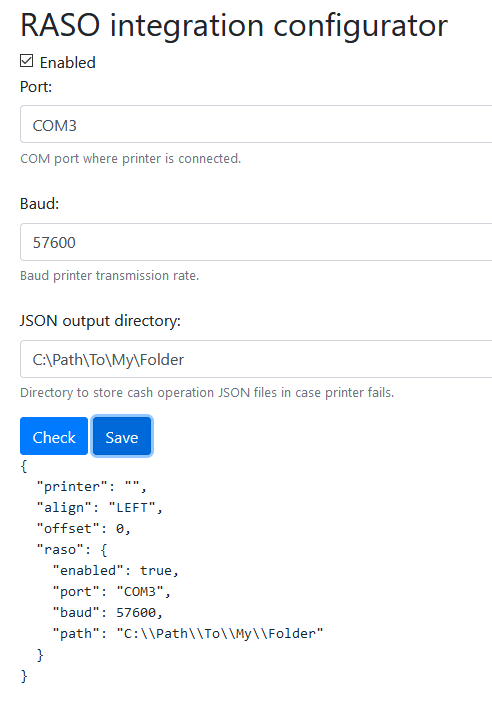
Once you're connected to the printer, it's time to set up the settings. Don't forget to tick Enabled at the beginning to enable RASO integration. In the fields below "RASO integration" input your port ("COM3", "COM5", etc…), baud (57600, 38400, 19200, etc…).
Once you're done setting up the fields, press "Save" and if the saving operation was successful, you should see a raw JSON output with your information below.
The printer will now listen for incoming cash operation print requests.
NOTE: All cash operations that couldn't get printed will be saved at:
%AppData%/FrontIT/PrintServer/cash-operations