STB's Set-Up Guide
What's In The Box
In the STB device, box user will find:
- Set-Top Box (STB)
- HDMI cable
- AC adapter
- User manual
- Warranty card
STB Registration at TV Manager
For using STB first you need to register the device at the TV Manager.
To register the device you need:
- Go to the TV Manager page
- Go to the Settings
- Go to the Screens
- Click "+ Add Screen" button
- Enter MAC Address into the MAC Address field
- Enter the Name into the Name field
- Select Display Mode from the dropdown menu
- Select Orientation from the dropdown menu
- Select Profile from the dropdown menu
- Select Group from the dropdown menu
- Set Wi-Fi access point (optional)
- Click the "Save" button to finish the screen registration
You can find more information about settings-screens page here: https://wiki.advbet.com/tv-manager/user-guide#screens
STB Set-Up
To set up the STB user needs to:
- Connect the HDMI cable
- Connect the AC adapter
- Insert USB key (optional)
- Connect network cable or Wi-Fi
If you want to use Wi-Fi for Internet connectivity on the first start, you will see an error message. To Configure Wi-Fi you will need to enter the configuration interface. To do so you need to connect a USB keyboard (not provided) to the STB. Before entering the configuration interface you will be asked to enter an administrator password.
You can check how to set up Wi-Fi on the Network and Internet Section.
Settings
To go to the STB settings menu you need to connect the USB keyboard to the STB to navigate the STB settings menu you need the arrows and enter buttons, and also a couple more combinations.
STB Settings menu buttons Combinations:
- CTRL + ESC - to go to the STB settings menu
- CTRL + ALT + BACKSPACE - to go back
- CTRL + ALT + DELETE - to go back from the Wi-Fi/Bluetooth success/failed menu
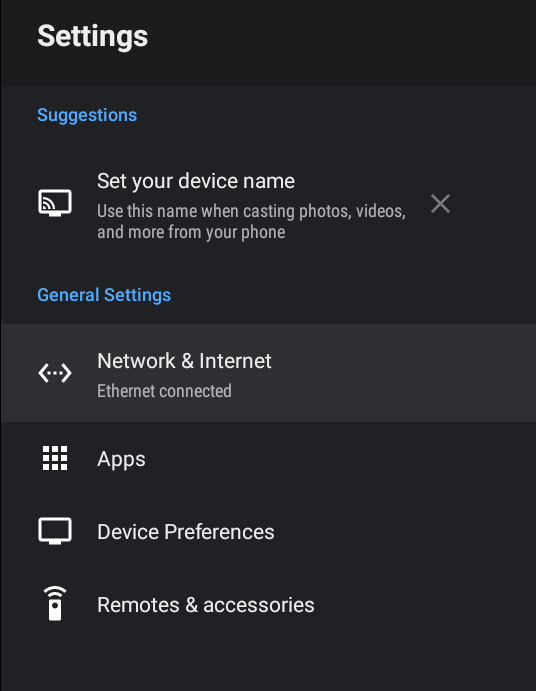
Network and Internet
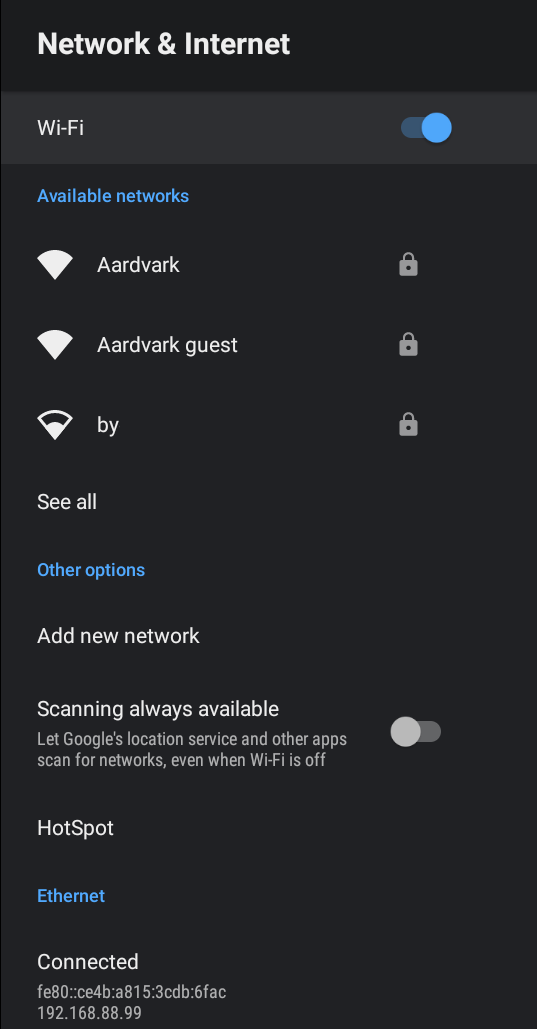
On the network and internet settings menu you will find:
- Wi-Fi toggle - with which you can turn on and turn off the Wi-Fi.

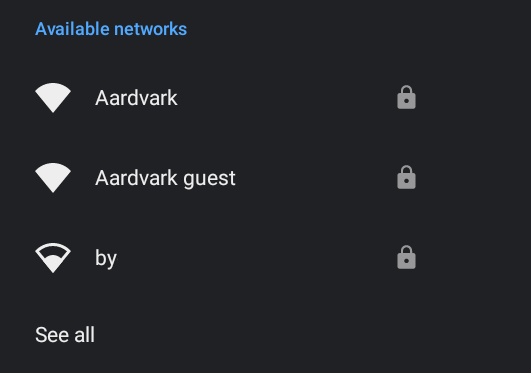
- The list of available networks - if Wi-Fi is turned on.
- The add new network button - by clicking on it you will have the possibility to add a new Wi-Fi network.

- Scanning always available toggle - where you can let Google's location service and other apps scan for networks, even when Wi-Fi is off.

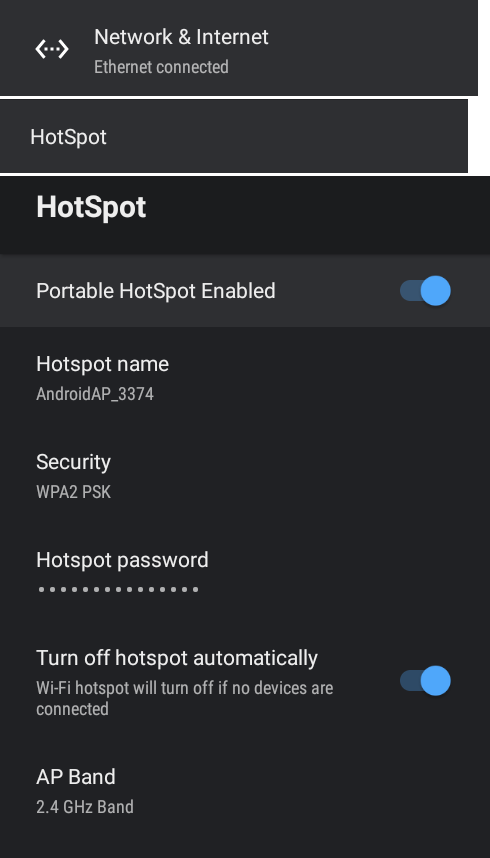
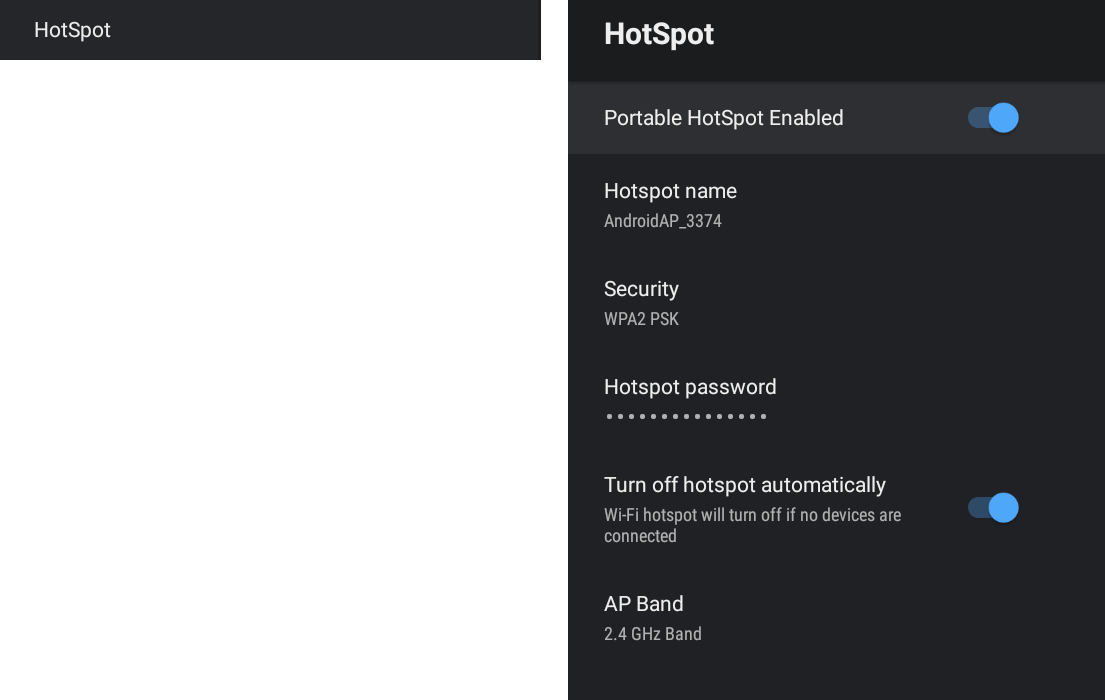
- Hotspot button - where you can enable or disable portable hotspots. If the hotspot is enabled user can edit the hotspot name, security type, hotspot password, and AP band and toggle the turn-off hotspot automatically setting.
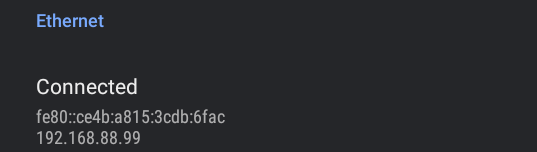
- Ethernet connected network info
- Proxy settings button - by clicking on it you will have the possibility to select none or manual proxy settings.
- IP settings button - by clicking on it you will have the possibility to select DHCP or static IP settings.
Apps
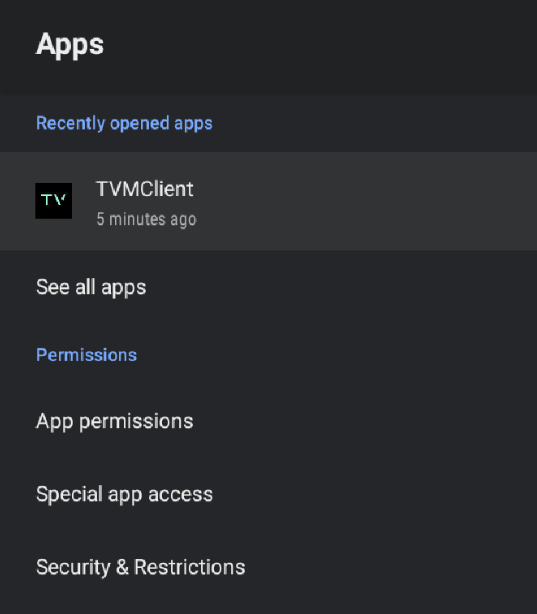 On the apps settings menu you will find:
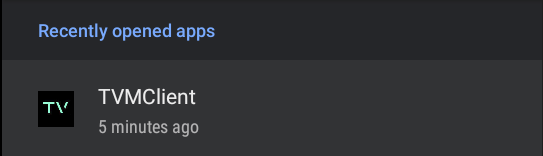
- The list of recently opened apps - such as the TVMClient app
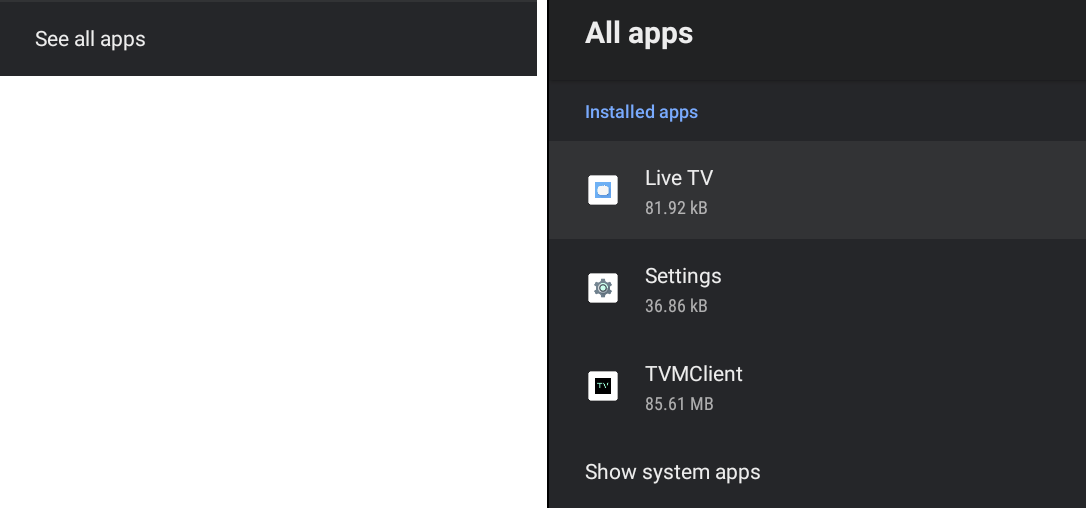
- See all apps button - by clicking on it you will have the possibility to see the list of all installed apps
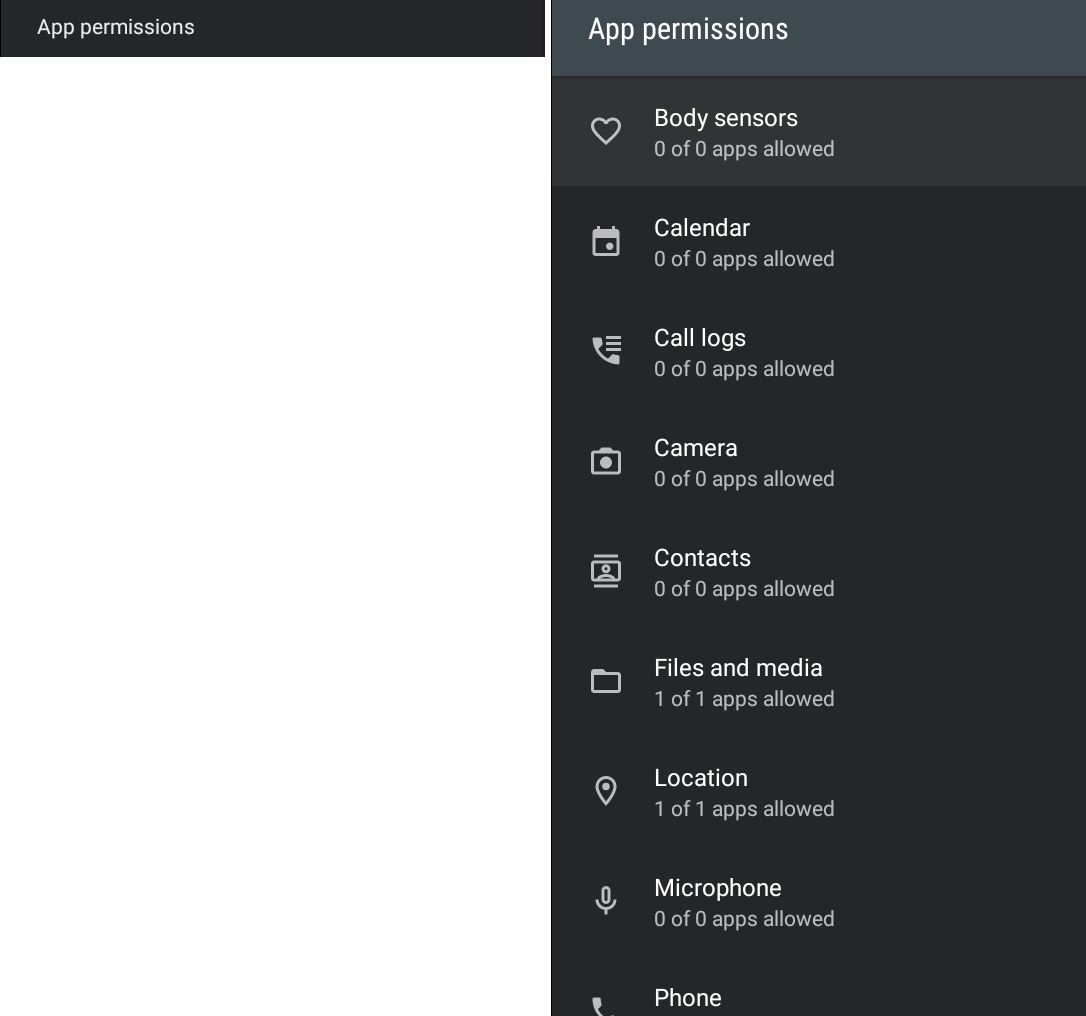
- App permissions button - by clicking on it you will have the possibility to see the list of all app permissions
- Special app access button - by clicking on it you will find multiple selections such as:

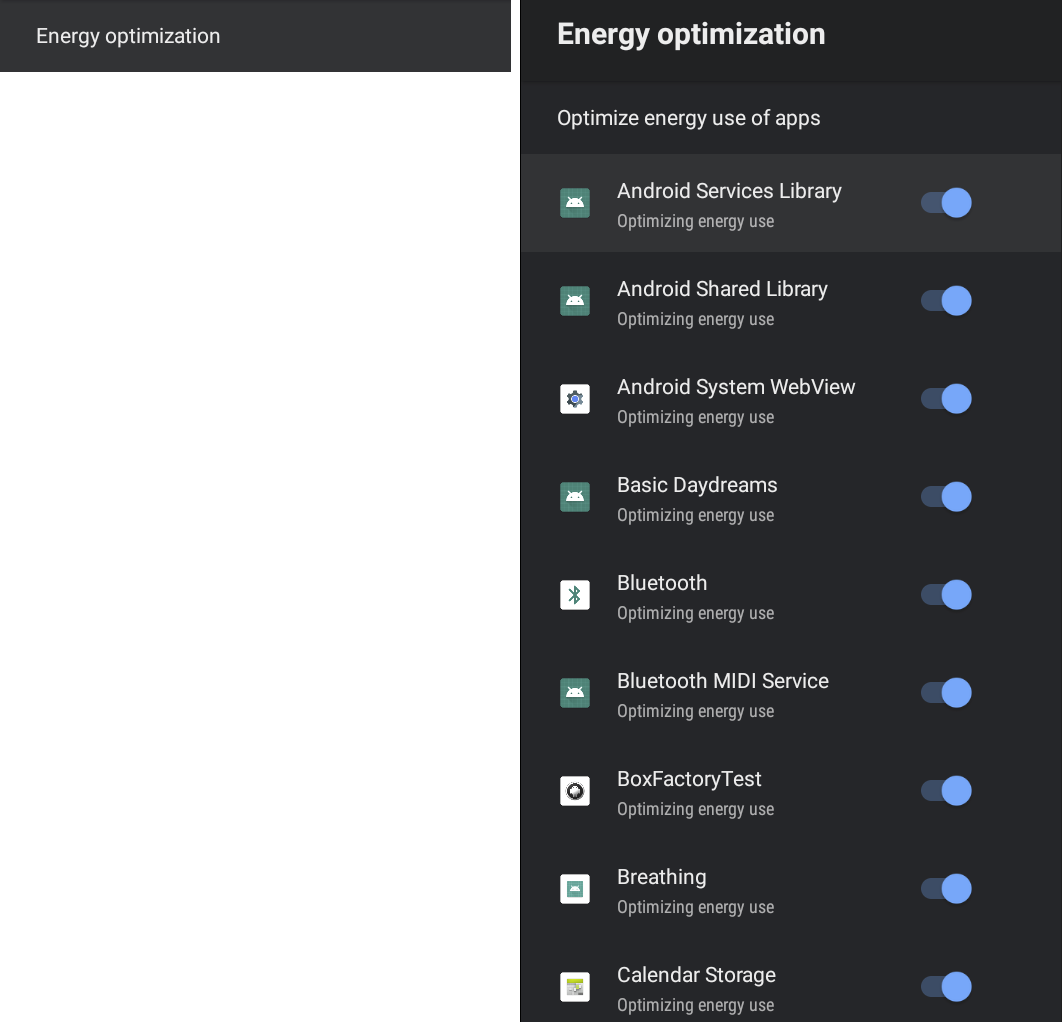
- Energy optimization button - by clicking on it you will find the list of apps for which energy usage can be optimized

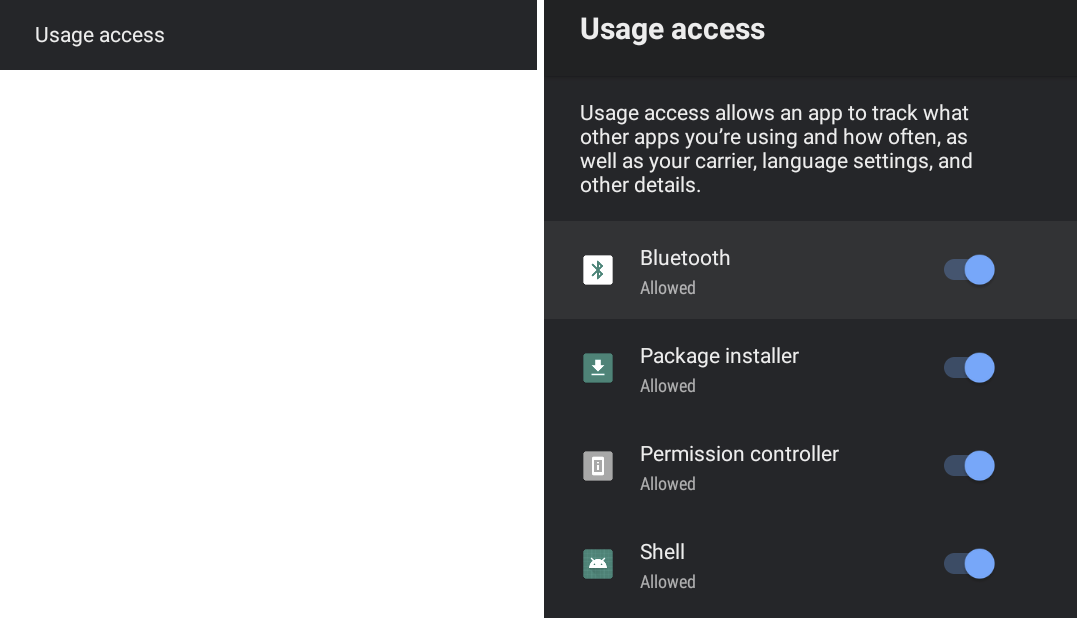
- Usage access button - by clicking on it you will find the list of apps for whom allowed to track what other apps you are using and how often as well as your carrier, language settings, and other details. Usage access for the app can be allowed or not allowed.
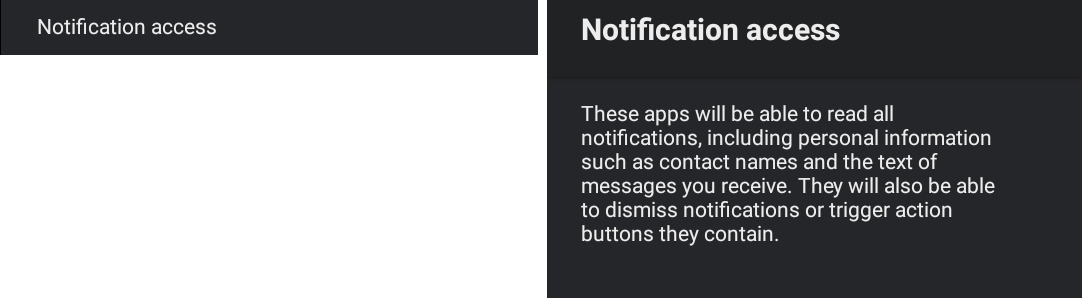
- Notification access button
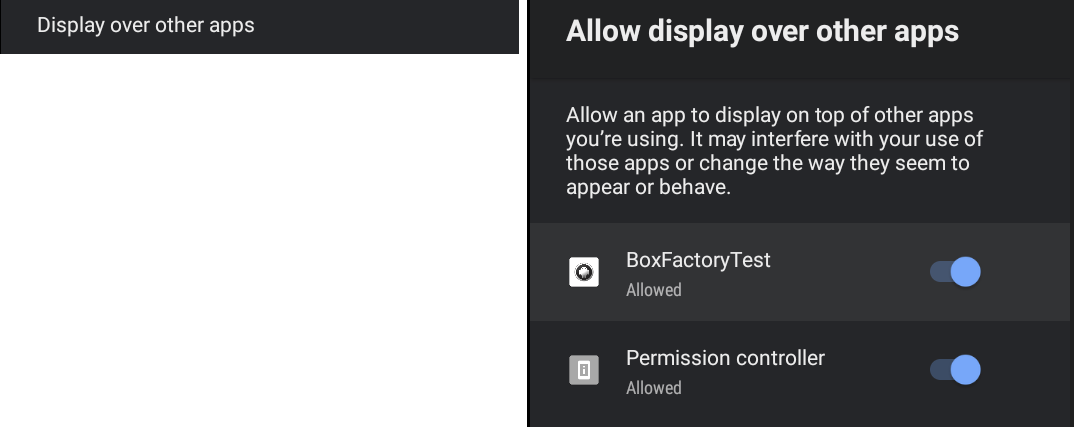
- Display over other apps button - by clicking on it you will find the list of apps for that are allowed to display over other apps.
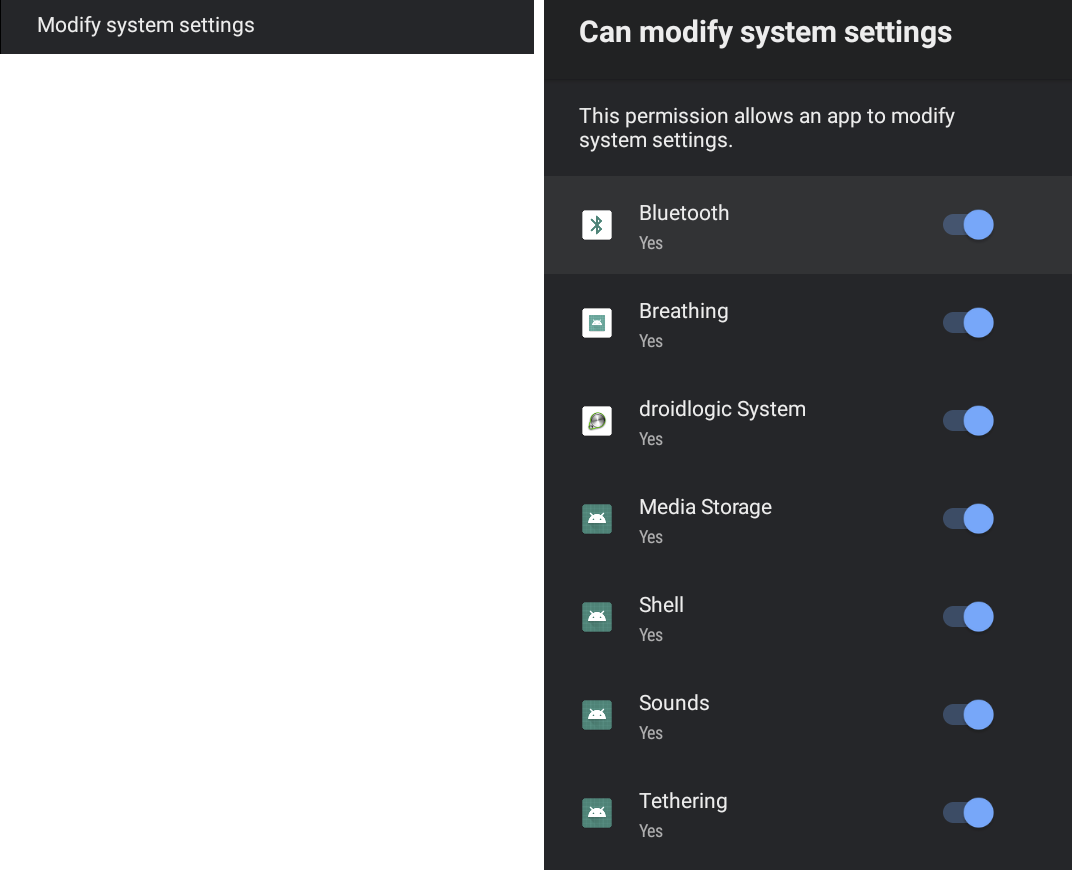
- Modify system settings button - by clicking on it you will find the list of apps for whom allowed to modify system settings
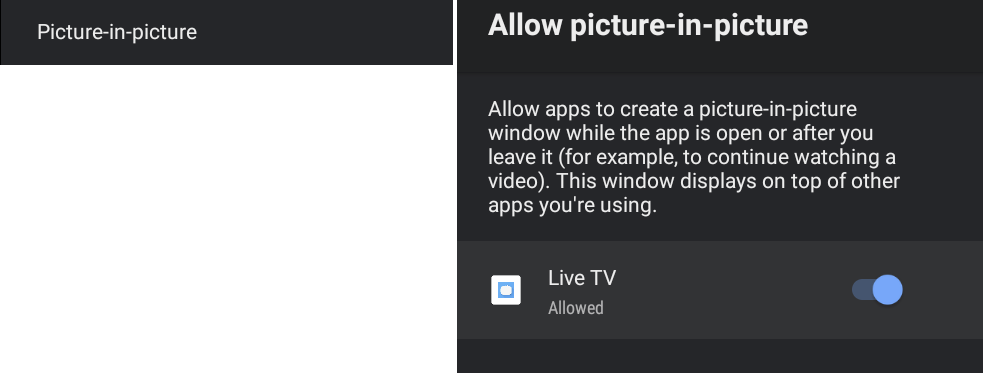
- Picture in picture button - by clicking on it you will find the list of apps for whom allowed to create a picture in picture window
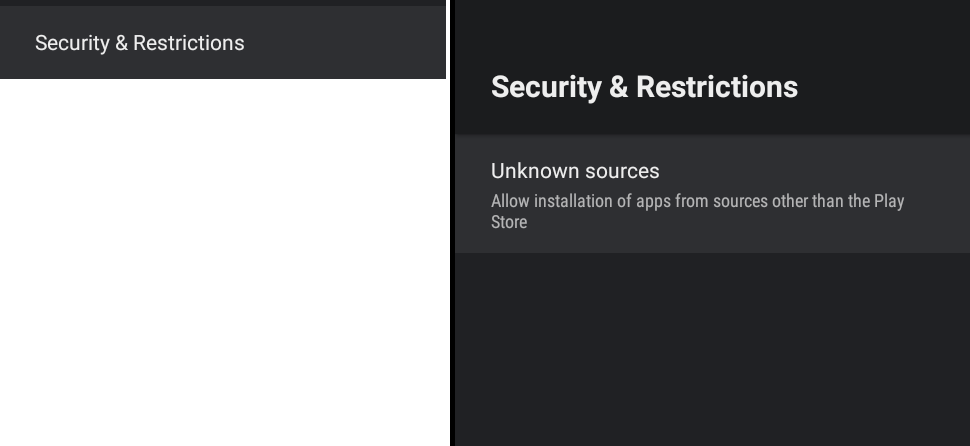
- Security and restrictions button
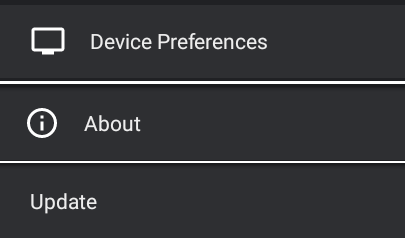
Device Preferences
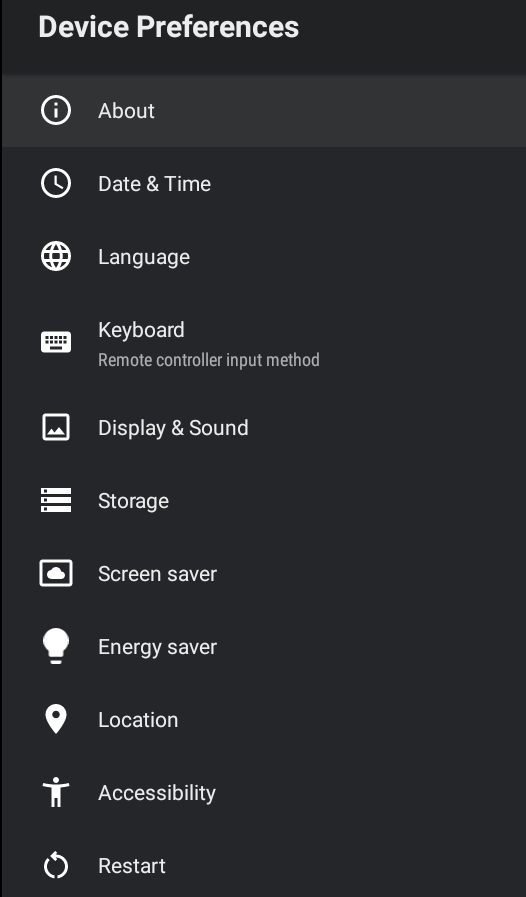 On the device preferences settings menu you will find:
- About button - by clicking on it you will find multiple selections such as:
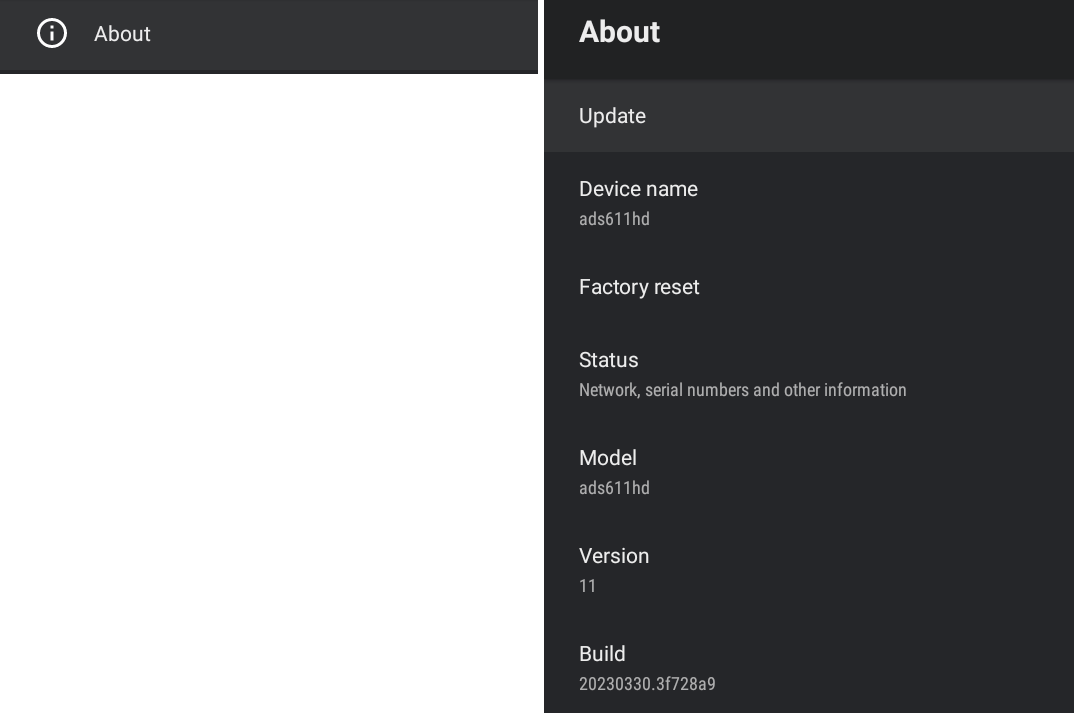
- Update button - by clicking on it you can easily update the STB

- Device name button - by clicking on it you can change the name of the device

- Factory reset button - by clicking on it you can factory reset the STB

- Status Button - by clicking on it you will find information such as:

- IP address
- Device MAC Address
- Bluetooth address
- Serial number
- Up time
- Model info

- Version info

- Build info

- Date and time button - by clicking on it you will find multiple selections such as:
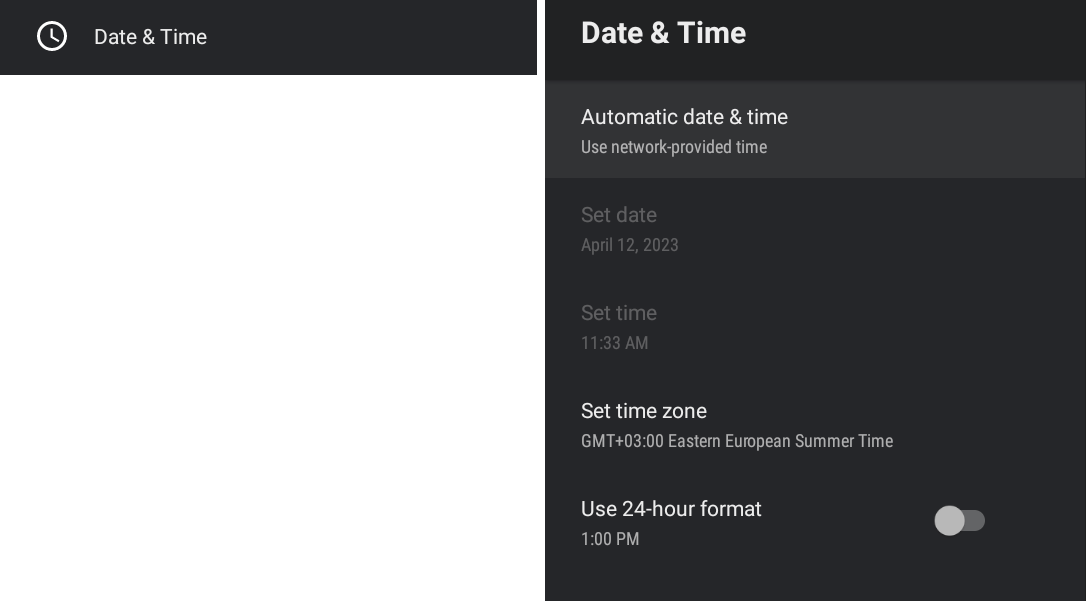
- Automatic date & time button - by clicking on it you can select to use network provided time or turn off the automatic date & time function. If this function is turned off you can manually set the date and time
- Set time zone button - by clicking on it you can select any wanted time zone
- Use 24-hour format toggle - by switching the toggle you can select between 12 and 24-hour formats
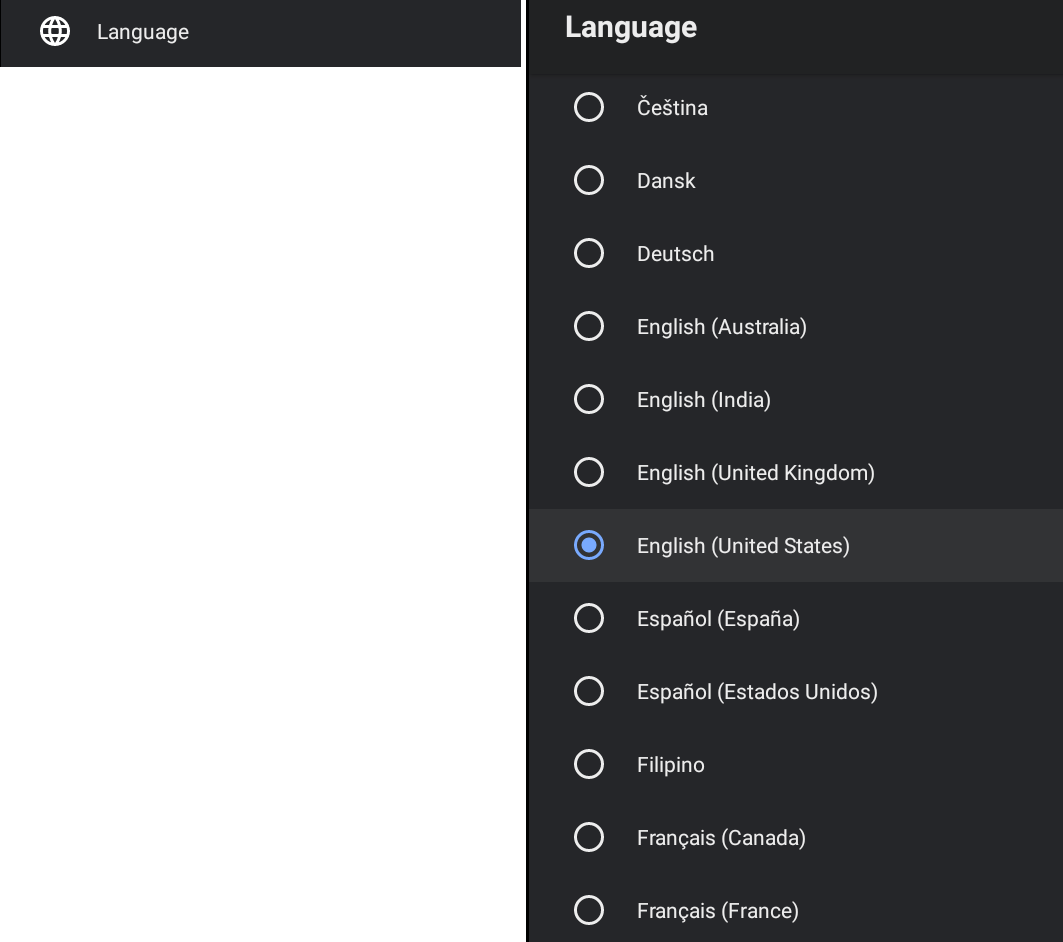
- Language button - by clicking on it you can select any wanted language
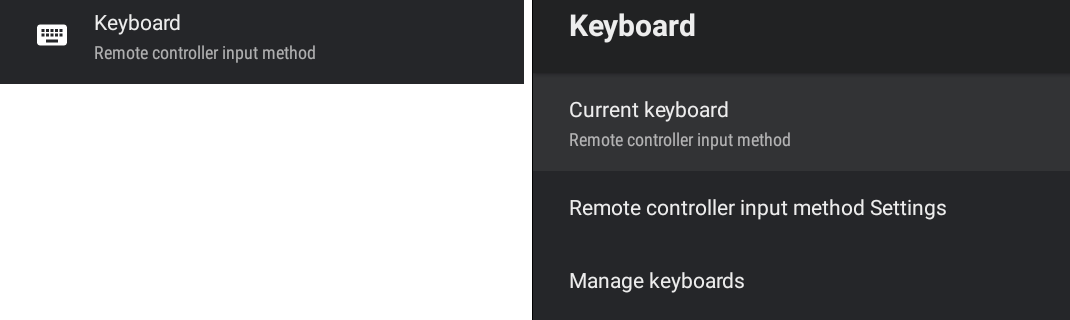
- Keyboard button - by clicking on it you can select the current keyboard if multiple keyboards are connected, adjust remote controller input method settings such as sound feedback, vibration when typing, input prediction
- Display and sound button - by clicking on it you will find multiple selections such as:

- Screen resolution button - by clicking on it you will find multiple selections such as:
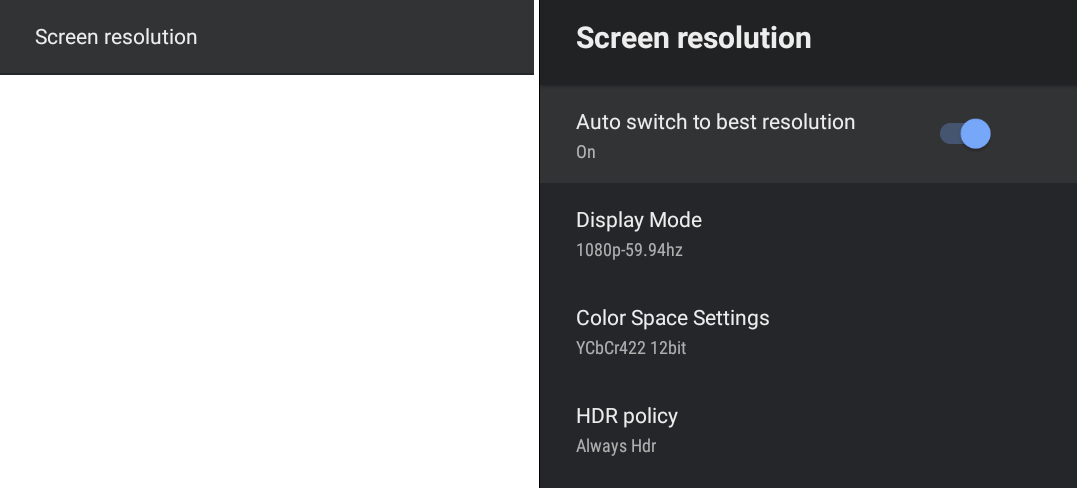
- Auto switch to best resolution toggle - by switching a toggle you can turn off and turn on auto-switching to the best resolution function
- Display mode button - by clicking on it you can select the wanted display mode
- Color space settings button - by clicking on it you can select the wanted color space setting
- HDR policy button - by clicking on it you can select the wanted HDR policy option
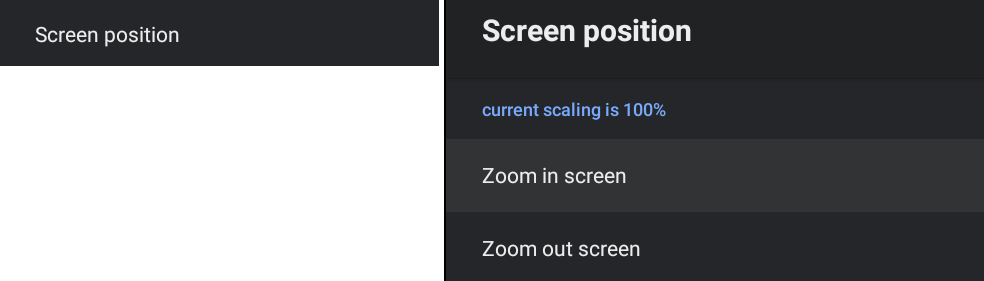
- Screen position button - by clicking on it you will see the current screen scaling and also you can zoom in or zoom out the screen
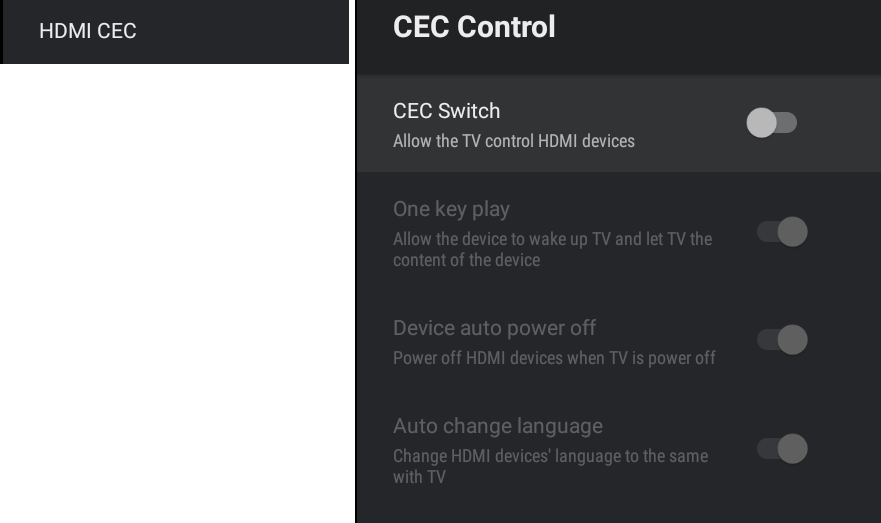
- HDMI CEC button - by clicking on it you can allow the TV to control HDMI devices, allow the device to wake up TV, allow to power off HDMI devices when the TV is powered off, and allow to change HDMI devices language to the same with TV
- System sounds toggle - by switching it you can turn on or off the system sounds

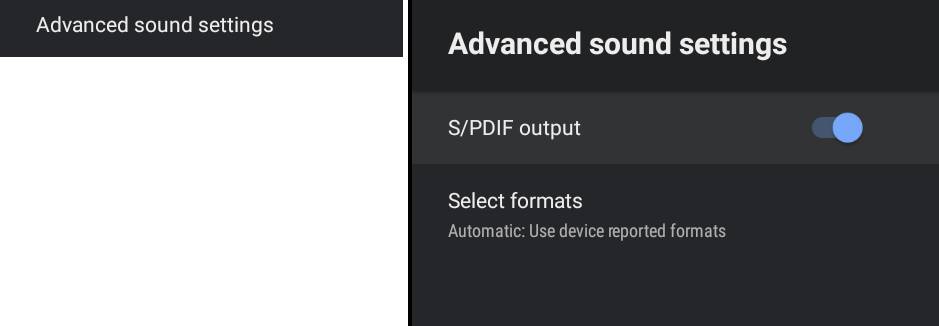
- Advanced sound settings button - by clicking on it you turn on or off the S/PDIF output and select sound formats
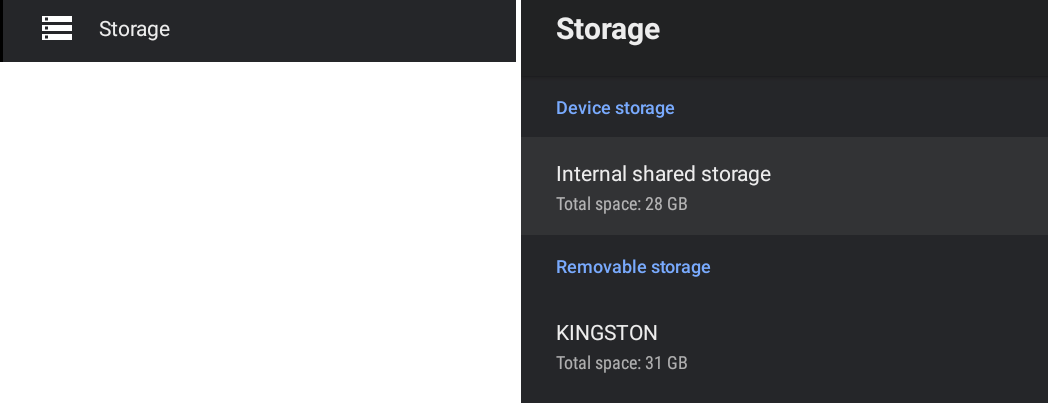
- Storage button - by clicking on it you will see the internal shared storage info and the removable storage info
- Screen saver button - by clicking on it you will find multiple selections such as:
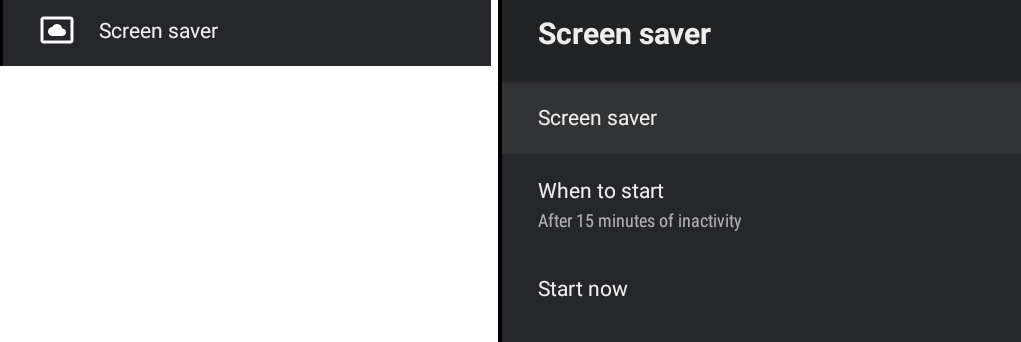
- Screen saver button - by clicking on it you can turn the screen saver off
- When to start button - by clicking on it you can set the time after which the screen saver will be displayed
- Start now button - by clicking on it you can start to show screen saver immediately
- Energy saver button - by clicking on it you can set the time after that the screen will turn off

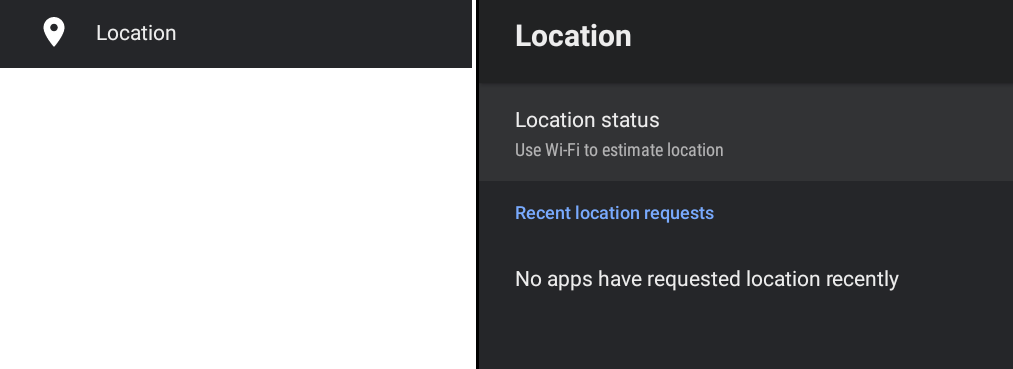
- Location button - by clicking on it you can see the location status. It is possible to turn it off or to set it to use Wi-Fi to estimate the location
- Accessibility button - by clicking on it you will find multiple selections such as:
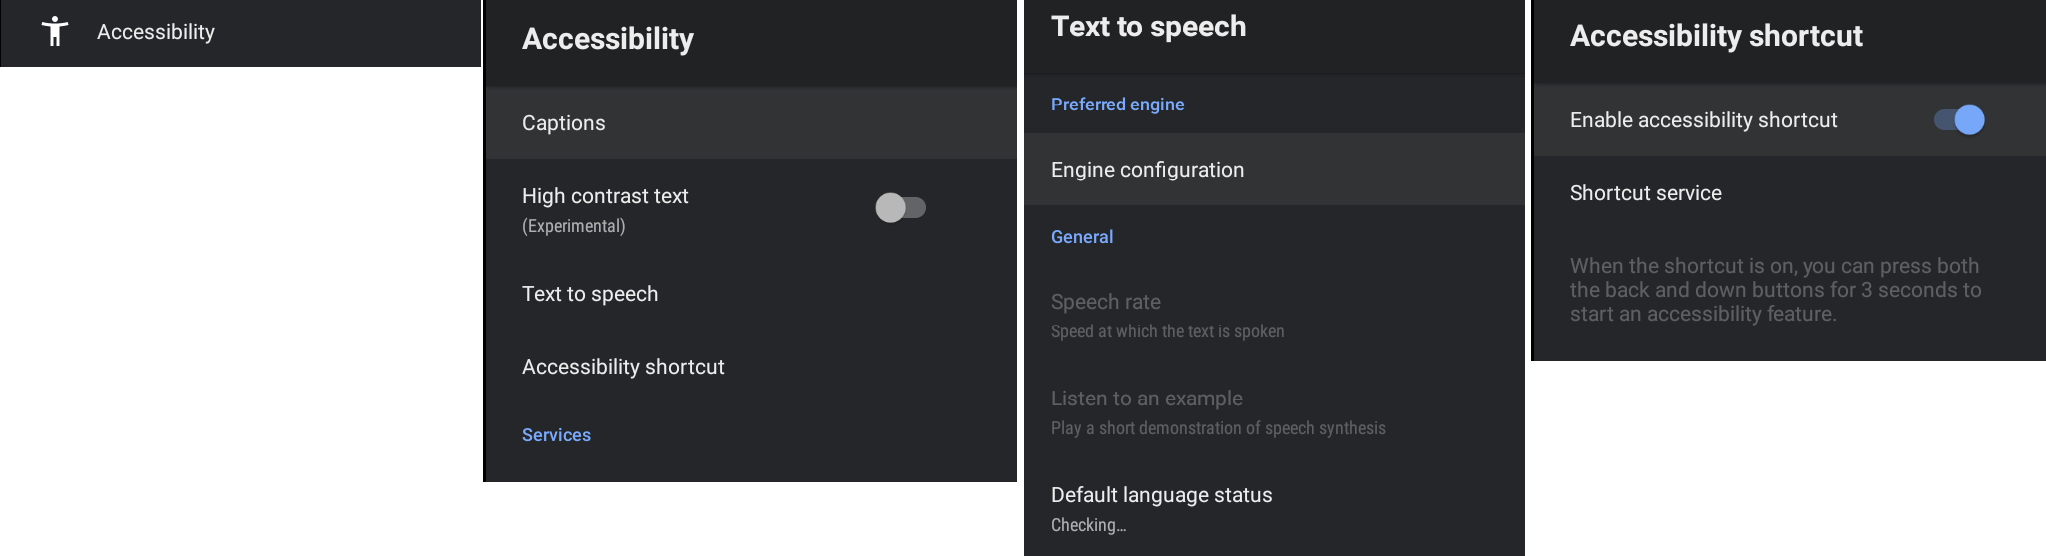
- Captions button - by clicking on it you will find multiple selections such as:
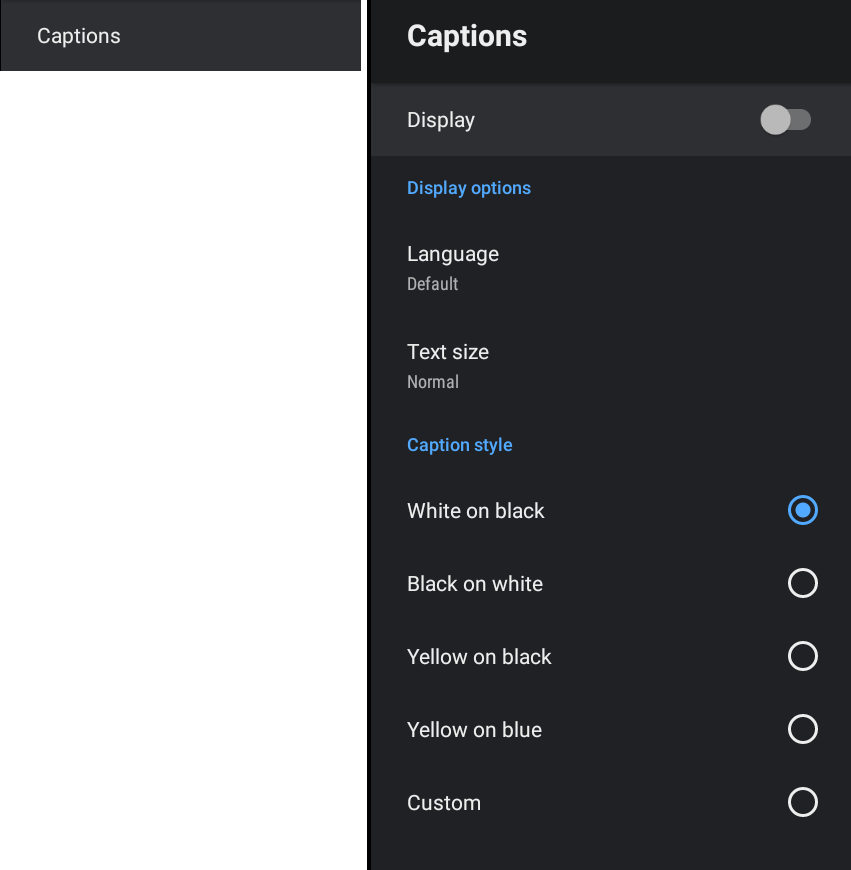
- Display toggle - by switching it you can turn on or turn off the caption displaying
- Language button - by clicking on it you can select the language for the captions
- Text size button - by clicking on it you can select the text size for the captions
- Caption style selection menu - where you can select the style of the captions
- High contrast text toggle - by switching it you can turn on or off the high contrast text mode
- Accessibility shortcut button - by clicking on it you will find multiple selections such as:
- Enable accessibility shortcut toggle - by switching it you can disable or enable the accessibility shortcut
- Shortcut service info - when the shortcut is on both the back and down buttons for 3 seconds to start an accessibility feature
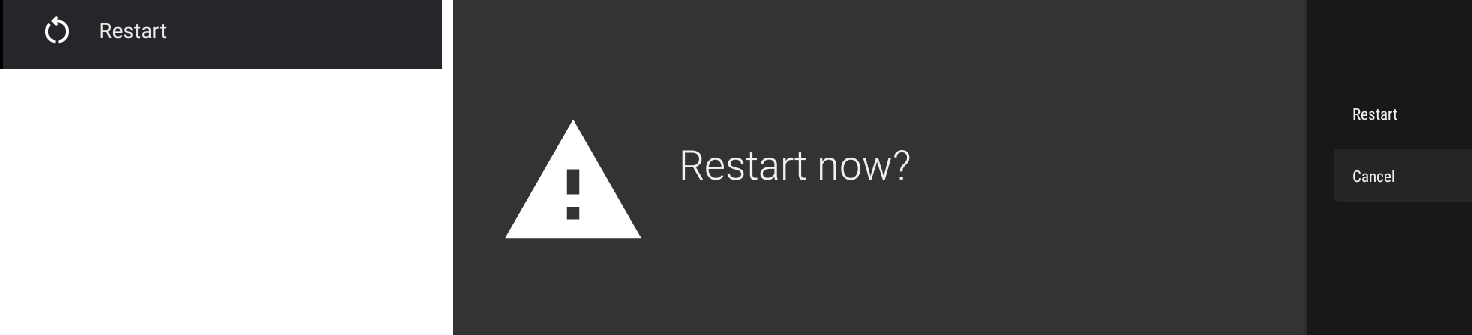
- Restart button - By clicking on it you can restart the STB
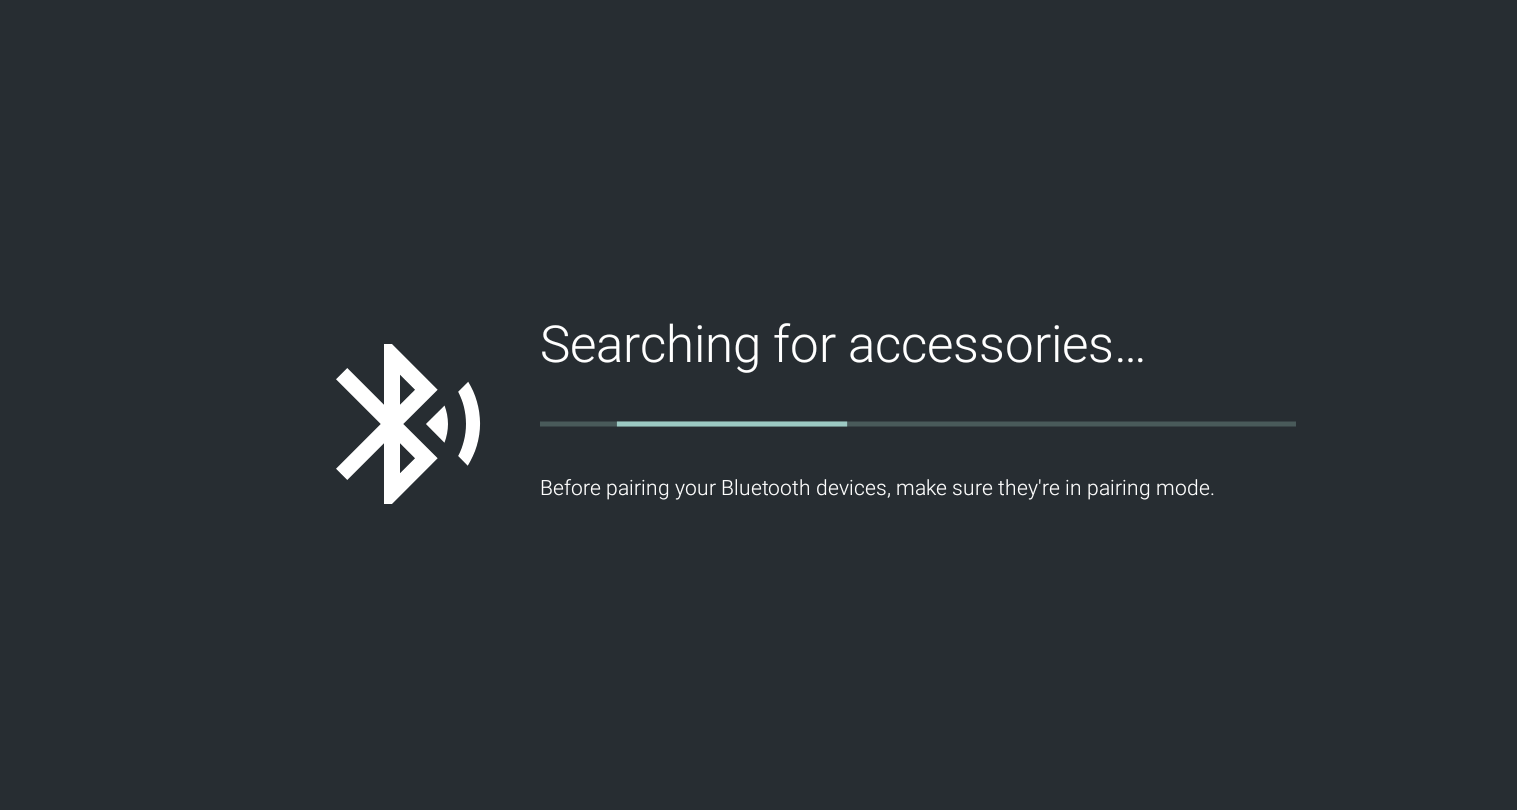
Remote and Accessories
On the remote and accessories settings page you can pair the Bluetooth devices like speakers and etc.
Most Common Actions
LAN Setup
- Connect the LAN cable to the STB and the LAN will be automatically connected
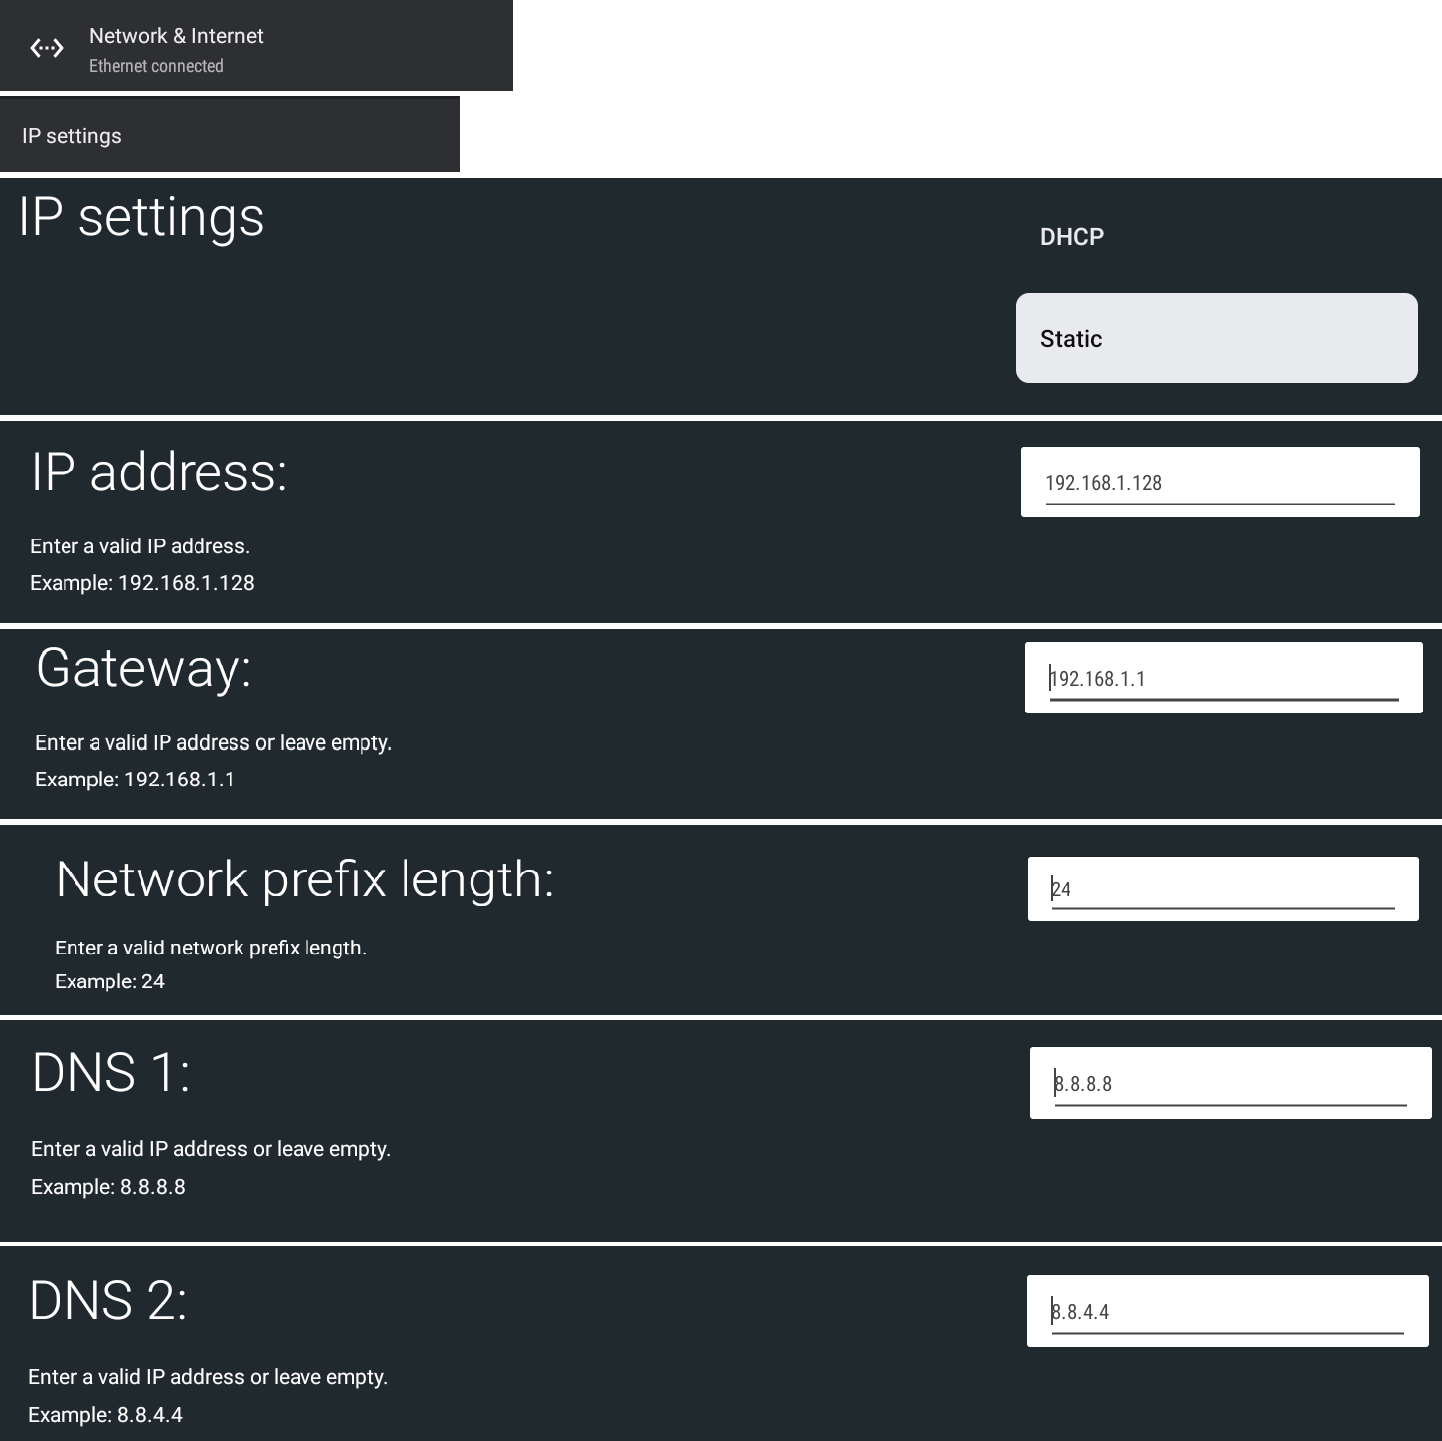
- For static IP configuration select Network & Internet
- Select IP settings
- Select Static
- Enter a valid IP address and press Enter
- Enter a Gateway and press Enter
- Enter a Network prefix length and press Enter
- Enter a DNS 1 and press Enter
- Enter a DNS 2 and press Enter
Wi-Fi Setup
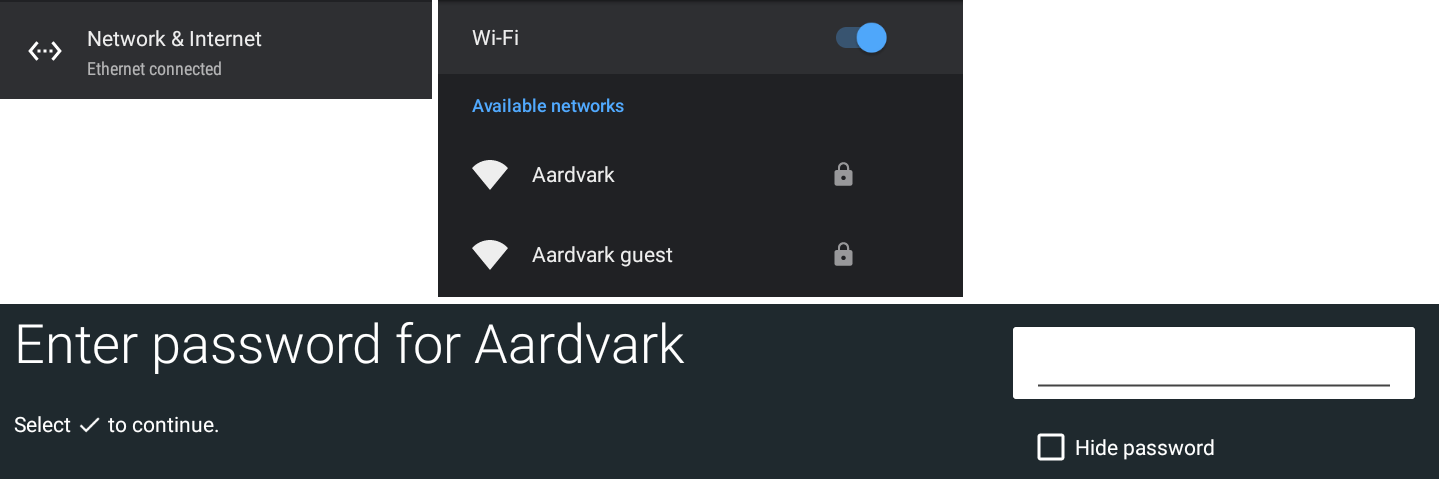
- From the general settings configuration interface select Network & Internet
- Make sure the internal Wi-Fi device is turned on by selecting the Wi-Fi settings menu item and switching it to ON
- Select the desired network from the list to connect to it
- Enter your Wi-Fi network password in the input field
STB Factory Reset
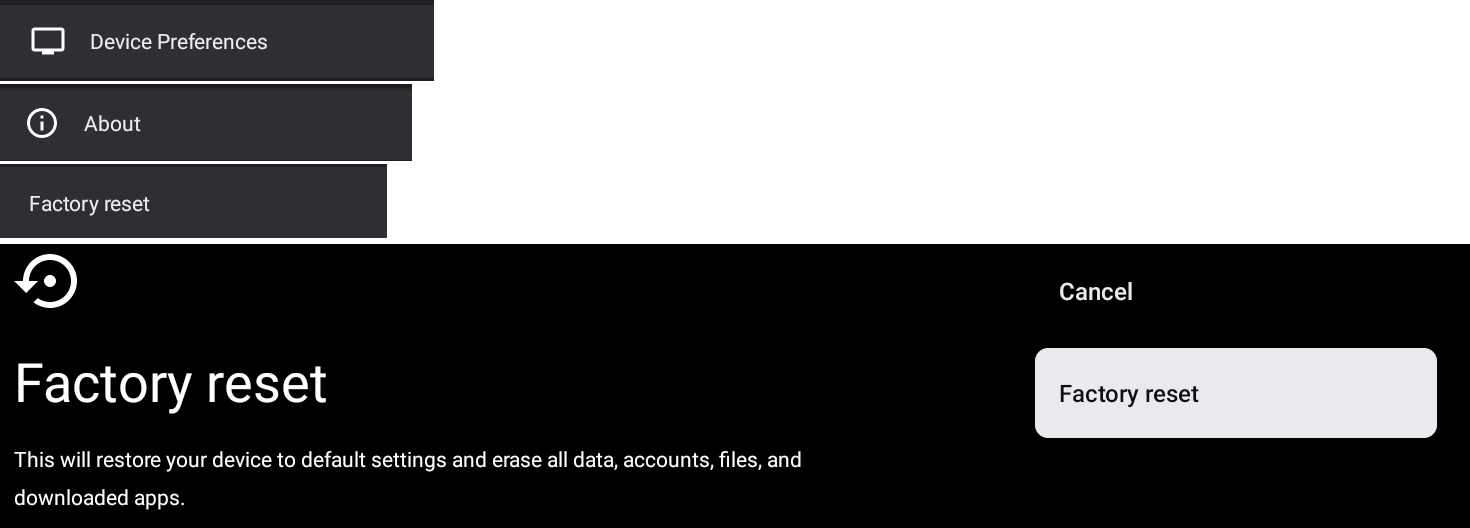
- From the general settings configuration interface select Device Preferences
- Select About
- Select Factory Reset
- In opened window select factory Reset
STB Update
- From the general settings configuration interface select Device Preferences
- Select About
- Select Update
STB App Cache Cleanup
- From the general settings configuration interface select Apps
- Select the wanted app from the apps list
- Select Clear Cache
- In the opened window select OK
![]()
STB Hotspot Setup
- Connect the LAN cable to the STB
- From the general settings configuration interface select Network & Internet
- Select Hotspot
- Enable Portable Hotspot
- If needed change the Hotspot name, password, security type, and AP band